Creating a Composer Package from Existing Project
I am intending to try to make more screencasts and blog posts about things that I feel are not well covered. Creating a Composer Package, while this screencast is not all encompassing, tends to be one of those things that people use, but often do not create. The following video is me going through the process for a simple package that came to mind the other day (see future blog posts :D).
Here's the video, but the content after the video lays out the basic process.
Create a Composer Package
Step 1 - Composer Init.
When creating a Composer Package, you need a place to store the contents of the package. Generally you can add this to an empty folder wherever you normally store your projects. Create a new folder with a relevant name.
Inside this folder (assuming Terminal), and that you have Composer installed already, run composer init.
The composer init command will walk you through the bare minimum of things you need to create your package. It asks you for a vendor/package name, a description, minimum-stability, dependencies as well as some other basic information.
Step 2 - Create Meta files
Additional to composer.json most packages come with a readme.md, a LICENSE, .gitignore. Fill in the appropriate license content as well as information in the Readme. Things like installation notes, version information, basic usage are all good things for the Readme.
Step 3 - Create Folders
Generally the code is stored in a src folder with additional folder structure within it. Frequently another folder is a tests folder.
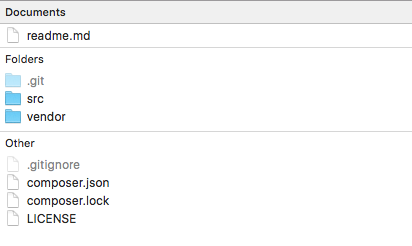
So at this point your project should look something like this:
Step 4 - Add the Code
Add the code in the appropriate folders
Step 5 - Make sure your Namespaces are correct
In your project you probably added a namespace, but it's probably going to be a little different for your package. You need to make sure they are correct to avoid any "Class not found" errors.
Step 6 - Add Autoload information in the Composer.json file
This is really important. This tells Composer where to look in order to autoload your packages files. Without this, your package isn't going to work.
Step 7 - Update the Readme with appropriate installation information.
I mentioned this before, but it really is important to tell potential users how to install and use your package. The easier it is for them, the more likely they are to use it.
Add to Github
Once you have the steps above complete, you need to add the contents to Github. This tutorial isn't really about Git and Github, so the quick and dirty steps to add to Github:
git initin the project root- Create a new repository on Github (it will provide directions on how to add your new repo to Github).
git add .to add everything to the staging area for git (this is in the project root again)git commit -m 'good message'creates a commitgit remote add origin path/to/git/should/be/copied/from/githubtells git where the remote location is locatedgit push -u origin masterpushes the local git to the remote
That should be pretty standard stuff for working with Git/Github, I might do a series on Git if I have time.
Now the next steps on Github involve publishing our package to Packagist. View the repository page on Github and click on "settings" then click on "Webhooks & Services." Then click on "Add Service" and type in "Packagist." You will need to add your Packagist username (NOT EMAIL) and the token from your Packagist account.
If you do not have a Packagist account, go create one now and copy your token.
Once this is created, we need to Submit the repo to Packagist.
Add to Packagist
Go to packagist.org, and after you login, click "Submit" in the top navbar. You will want to copy the git address from the Github repository page and paste it in the Repository URL field.
This should connect your repository to Packagist.
Now install the package and follow the steps in your readme and verify they are accurate and work. Make any adjustments if needed.